
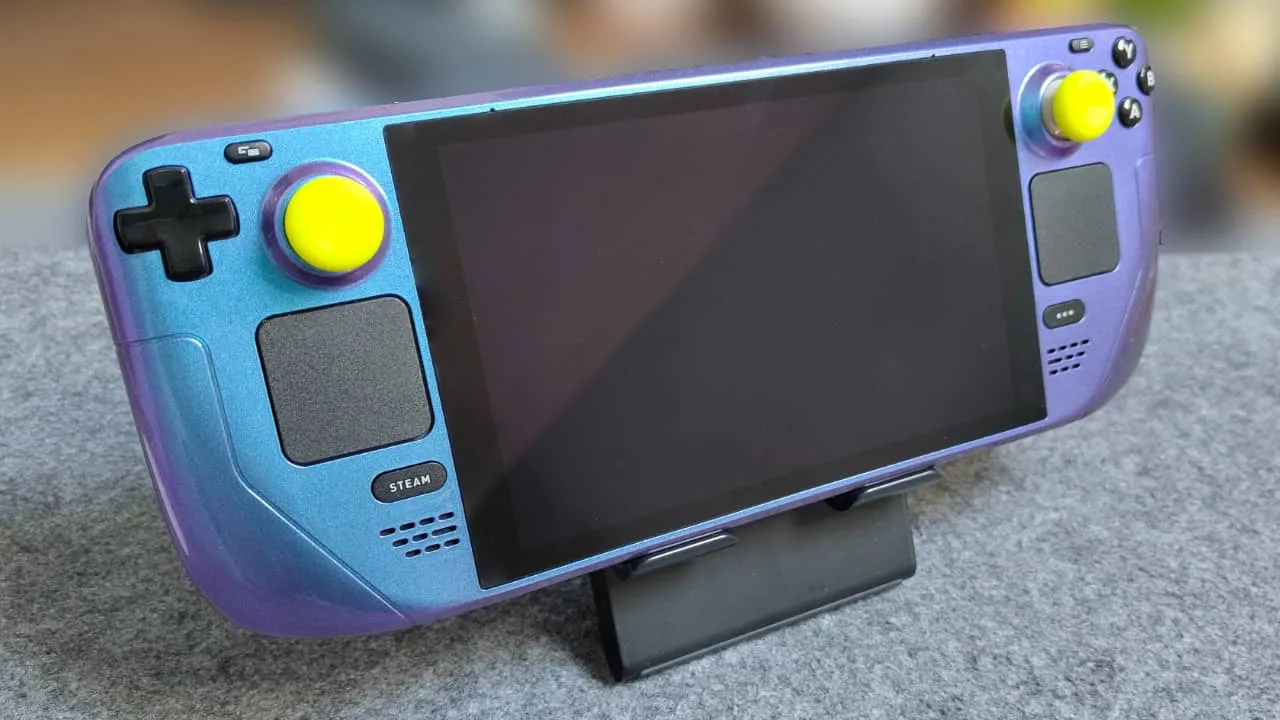
I haven’t been writing much these days for a couple of reasons. The main reason was ‘performing’ a Steam Deck shell replacement. If diligently studying means watching half a dozen YouTube videos, then that’s what I’ve been doing, but in reality, it meant spending an accumulated hour of videos and days deciding on what colour scheme.
This is a traditional blog post and not a how-to guide; it’s just an opinion and links to what I used. In short, should you go all out and replace your Steam Deck shell? While there, you could swap out the storage, sticks, time travel device, and… the screen.
I opted for the chameleon purple blue Steam Deck replacement shell from eXtremeRate via Amazon for the following procedure. The thumbsticks are by Skull Co. I was going to go for the purple ones, but I wanted to make a statement and chose yellow.
Following The eXtremeRate Guide
In terms of performing the operation, all I used was the eXtremeRate guide; pausing it along the way with a few sections of repeating scenes, in fear of not getting it. This is not the be-all and end-all procedure some will have you believe. I’ve tinkered with a few gadgets, but never more than soldering, having ballsed up a Sega MegaCD with a 30p transistor. No, there was only one casualty with this: the original Steam Deck shell through choice.

Everyone swears by the iFixit kit, and though it was on hand, the provided cheapo screwdrivers worked fine. Taking the back off is the easiest; removing each component step by step is a doddle, though I’d suggest keeping everything in compartments. If you don’t, it’s not an issue, as the guide is excellent, and the only real problem would be losing screws (provided) or rounding them off.
I encountered three problems when replacing my Steam Deck shell: yanking out a power cable for the trackpad(?), which pulled the cable out of its housing. If you’re careful, you can remove the components without pulling this cable out, so I’d highly recommend you leave it. The second problem was the screws that attach the metal chassis to the front shell. These quickly rounded off, and two got stuck, preventing progression. So… I twisted them off. The original Steam Deck shell is ok, aside from two tiny screw holes that snapped.
The third problem didn’t happen until I put everything together, and that was the screen. The Steam Deck screen was my biggest concern. My experience with heat guns hasn’t been good, and I wasn’t prepared to risk any damage with a hairdryer, so I bought the iFixit iOpener kit. Again, this isn’t affiliated and is a recommended purchase, as I used it to replace my old iPhone 11 screen with ease. Just don’t ask me about the ‘non-genuine’ warning.
Yes, the screen really was straightforward. It’s definitely time-consuming, as you want to be cautious when yanking it off (fnar fnar). Once that’s done, you need to remove excess adhesive from the metal chassis and the screen. DO NOT use anything metal, as this scratches up the bezel. I used a plastic plectrum from the iFixit kit, and my screen is perfect—not a single scratch.
Putting Back The Pieces
Fast forward to reassembly, and everything went like a dream. Again, the eXtremeRate video was perfect and genuinely fun. Having let the Steam Deck battery run down, it was now dead, but I’d seen in a couple of videos that you need to plug it into the mains again after disconnecting. Everything switched on, but the screen was black. After a few button combos to enter bios, nothing worked and then it was a mixture of asking the gods, mouthing ‘fuck’, and looking up the price of the Deck HD screen.
https://youtube.com/watch?v=0tBE10fSYBc%3Ffeature%3Doembed
Let’s open it up just in case a cable was disconnected…
Remove a select few components; it became apparent that the display ribbon had slid out. So, I reconnected that and BOOM! No, it didn’t blow up, but it worked perfectly, and I haven’t played any other machine for the past few days, revisiting classic games and a couple of favourites (the daily fix of Fallout Shelter).
Steam Deck Shell Replacement: Is It Worth It?
Should you take the risk and get yourself a Steam Deck replacement shell? Like a review, it’s subjective; I’d say go for it. The biggest skill you need is patience, not rushing through or trying to take shortcuts to speedrun and show off on social media. Disassembly took around an hour, not including the screen, which added another hour as I had to remove the adhesive and twist off the screws. The assembly took longer as the supplied back buttons were super tight; I had to redo it because of the black screen and multitasking as I was binging Eric on Netflix, too. I’d say this took an accumulated 5 hours and was worth it.
The eXtremeRate chameleon shell might be divisive. The shell looks nice because of the changing colour, but I had a Nokia in the 90s that was the same, and it looked cheap. Up close, it’s metallic paint and looks a bit rough, but to touch? It’s really nice. It’s far from slippy, and I actually prefer it to the original Steam Deck shell’s texture. Again, it’s up to you.
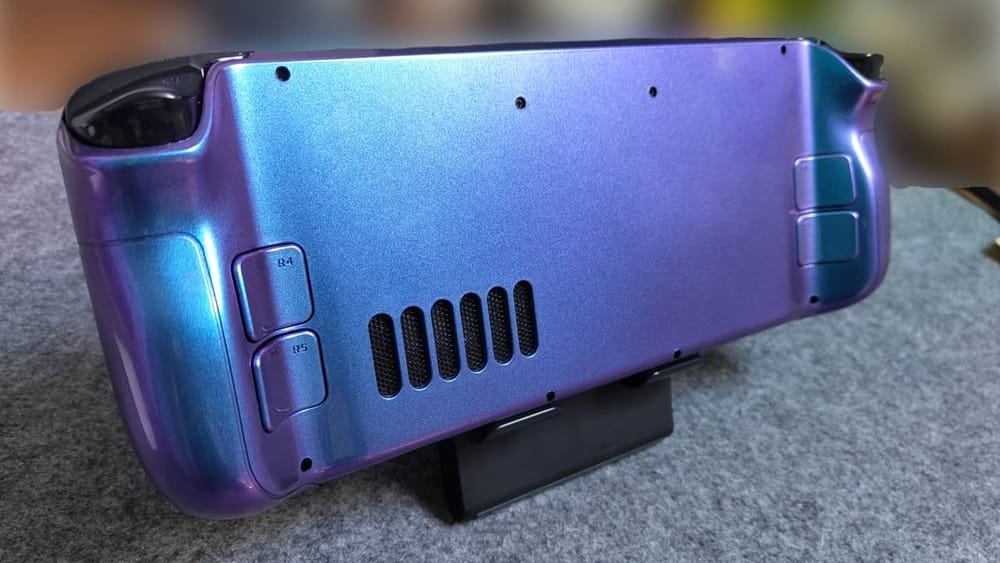
Why did I keep the black buttons? I didn’t want to faff about with the trackpads, plus I paid attention to Games Revealed video. It felt appropriate to keep everything original then, though you can’t keep the back buttons as they’re fixed to the original Steam Deck shell. The ones supplied work, but I never use the buttons, so I don’t care.
Was it worth replacing my Steam Deck shell? Absolutely. Would I do it again? Yes, but not for the sake of it. There’s no point in swapping the screen out each time, but changing the storage and buttons in the future should be easy enough, though I have no aspirations to. My only adjustment would be adding matching neon yellow buttons to the back to make it… snazzy.
The kit I used:
- Extremerate Chameleon Blue from Amazon (worth the price)
- Almost all the tools used were from the above, though I used my own (metal!) tweezers and dipped into my iFixit kit.
- iFixit iOpener kit
- Skull and Co. thumbstick grips
- Gin
- Desktop PC to watch Eric.
A quick update: everything is working perfectly, but… having used the touchscreen for typing, I’ve now realised that from the waist down, it’s effed. A ‘battery storage’ reboot didn’t work, and a DeckHD doesn’t seem worth the hassle. Does it work other than that? “Perfectly”. Would I do it again? Absolutely.


No Comment! Be the first one.